Homemade Bratwurst

Homemade Bratwurst
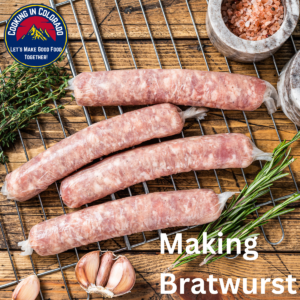
There’s something magical about the combination of warm summer days, the scent of a sizzling grill, and the simple joy of sinking your teeth into a perfectly cooked bratwurst. Whether you’re gathering with friends in the backyard, enjoying a family barbecue, or just indulging in a solo treat, few things can capture the essence of summer quite like a bratwurst.A bratwurst is not just any sausage. Originating from Germany, this seasoned pork sausage is typically infused with a blend of spices giving it a savory, slightly spicy flavor that’s both rich and satisfying. The texture of a well-made bratwurst is tender and juicy, with a slightly crispy casing that adds a perfect contrast to the soft, flavorful inside.Making homemade bratwurst sausage is a rewarding and fun way to enjoy this classic dish. With the right ingredients, a little patience, and some basic equipment, you can create juicy, flavorful bratwurst sausages that will rival anything you can find in a store. Here’s a simple, step-by-step guide to making your own bratwurst from scratch.
Equipment
- 1 Meat Grinder (KitchenAid Mixer has an inexpensive meat grinder attachment)
- 1 Sausage Stuffer (LEM has a nice entry level manual sausage stuffer)
Ingredients
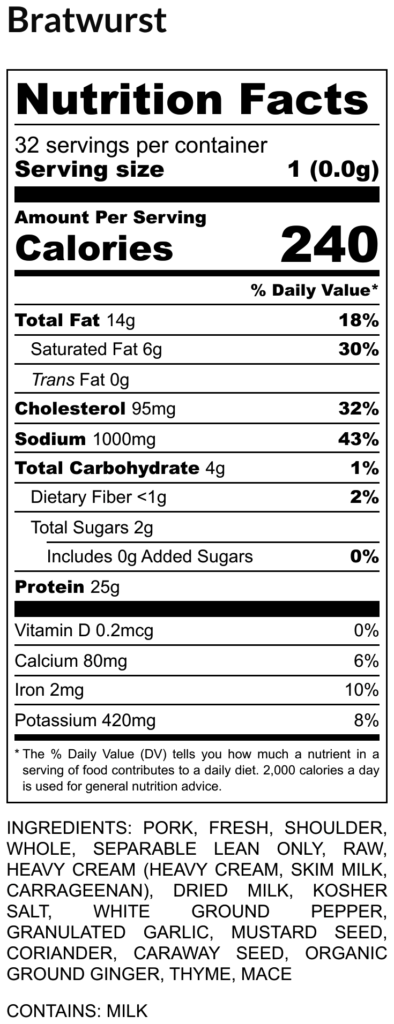
- 3736 grams Bone-In Pork Butt/Shoulder
- 72 grams Coarse Kosher Salt
- 18 grams Ground White Pepper
- 8 grams Ground Ginger
- 18 grams Granulated Garlic
- 12 grams Ground Mustard
- 4 grams Mace Spice
- 6 grams Dried Thyme
- 12 grams Ground Corriander
- 12 grams Carraway
- 144 grams Milk Powder
- 359 grams Heavy Cream
- 32-35mm Natural Hog Intestine Casings
Instructions
- Cut pork butt/shoulder into cubes that will fit through your meat grinder and place on a baking sheet. You want to keep the majority of the fat that is on the pork butt/shoulder, the sausage should be between 25 and 30 percent fat, this is why I use a pork shoulder when making bratwurst. Place meat into freezer for about 45 minutes to an hour to chill (this will make the grinding process easier). At this time you should place the meat grinder into the freezer as well as you want the grinder to be cold during the grinding process as well.3736 grams Bone-In Pork Butt/Shoulder
- While the meat is chilling in the freezer add the dry ingredients (with the exception of the milk powder) into a bowl and mix well.72 grams Coarse Kosher Salt, 18 grams Ground White Pepper, 8 grams Ground Ginger, 18 grams Granulated Garlic, 12 grams Ground Mustard, 4 grams Mace Spice, 6 grams Dried Thyme, 12 grams Ground Corriander, 12 grams Carraway
- Using an 8mm or 10mm grinding plate (coarse grind) grind all of the meat into a container large enough to hold all of the meat and to allow for mixing in the seasonings.
- Once you have ground all of the meat add the dry seasoning mixture to the meat and mix together. If you do not have a meat mixture this step is best completed by hand. I recommend wearing nitrile food safe gloves and mix the meat and seasonings together by hand. Once the meat and seasonings are mixed together place in the freezer for 15 to 30 minutes to chill (only chill if you are going to do a double grind - if not skip to step 6).
- (OPTIONAL STEP) After the ground meat has chilled we will do another grind (using the 8mm or 10mm grind plate). I do this step to get a smoother finish to the sausage and it helps the sausage bind together.
- Once you ground the meat and added the seasonings it is time to let the meat rest for 24 hours. Cover the container and place in the refrigerator. This step allows the added salt (and curing ingredients, if using) to properly "bloom" and extract the natural proteins in the meat, creating a better texture and flavor by allowing the meat to bind together and absorb moisture evenly.
- After 24 hours remove the sausage mixture from the refrigerator and mix in the milk powder and heavy cream. You want to mix until the mixture is sticky and the meat binds to your hands.If you do not have a meat mixture this step is best completed by hand. I recommend wearing nitrile food safe gloves and mix the meat and seasonings together by hand.
- Load the chilled sausage mixture into the stuffer's hopper. Use a spoon or your hands to gently pack the mixture into the stuffer, ensuring there are no air pockets. Air pockets can cause the sausages to burst or form uneven textures.
- Prior to stuffing the sausage, the casings need to be rinsed and then soaked. Follow the manufacturers instructions for this step. Once the casings have been soaked it is time to load them onto the stuffing tube. Pull the entire casing onto the stuffing tube.To ease the process of loading the casing onto the stuffing tube, I put a light coat of vegetable oil onto the stuffing tube. You also want to make sure that the casing remains moist in this process.
- Once you have the stuffer full of the sausage mixture and the casing loaded onto the stuffing tube you need to slowly start pushing meat through the stuffing tube. You want to stop the meat right at the tip of the stuffing tube. Now pull about 10 centimeters of the casing off of the stuffing tube and tie a knot in the end. Once you have a knot tied, pull the casing back onto the stuffing tube so the knot is right at the end of the stuffing tube. If you have any air bubbles in the casing you can use a sausage pricker to poke a small hole that will allow the air to escape during the stuffing process.
- Begin turning the crank (for a manual stuffer) or start the motor (for an electric stuffer) to begin forcing the sausage mixture into the casing. As the mixture fills the casing, keep an eye on the sausage’s firmness. You want it packed tightly, but not overstuffed. If using a manual machine, turn the crank slowly and steadily. If using an electric stuffer, ensure the mixture flows smoothly without getting air pockets or large gaps.As the casing fills, guide it down the tube with your hands. Keep it taut but not overly tight. This will allow the sausage mixture to fill the casing evenly. The goal is to stuff the casing tightly but not to the point of bursting. If you see the casing becoming too tight or looking like it might break, stop stuffing and adjust accordingly. You can also release the pressure if the sausage mixture starts to push out too quickly.
- Once you have stuffed the casing it is time to form the individual links. For a nice bun length bratwurst I like to make them about 7 inches in length. Pinch and twist the sausage at 7 inch intervals to form the links. Twist each link in opposite direction to secure the stuffing inside.After you have twisted all of your links, let the sausages rest for 30 to 45 minutes.
- After the sausage links have rested it is time to cut them into individual links. With a sharp knife or kitchen scissors snip the twisted casing between links. Be careful to not puncture the ends of the sausages during this step.
- Place the links onto baking sheets and place in the refrigerator for 24-hours. This will allow the casing to dry out, ensuring a better texture and also helps with preventing the sausage from splitting during cooking.
- At this point you can smoke or grill your bratwurst. If you made a large batch you can freeze some for future use. I use a vacuum food saver to vacuum seal the brats prior to freezing.
